.jpg)
Oak Flooring Direct Advice Centre

Here at Oak Flooring Direct, we love Happy Customers! In order to help you get the most from your new solid wood, engineered wood or laminate flooring, we have assembled the following guides to help you our valued customers. If you need any more advice, please don`t hesitate to get in touch with our team of experts, Our business thrives because of your valued input and feedback and we love to help in any way we can Just Ask!
Q: Can I sand an engineered wooden floor?
A: Yes - the amount of times you can sand an engineered wooden floor will depend on the thickness of the veneer. (typically 2 times)
Q: Can I install an engineered floor over under floor heating?
A: Normally yes - however we would recommend that specific Engineered Wood products are checked in advance and manufacturers’ guidelines are strictly adhered to (please also refer to our ‘Wooden Floors over under floor heating’ section in our ‘Help me’ page)
Q: Can I install an engineered floor over joists?
A: Only if the engineered wood floor is of 18mm thickness and above, and the joists are spaced at the correctly specified widths.
Q: Do I need to glue the joints on my engineered Wood floor?
A: Not normally - most modern click-type systems are designed to be used without glue. (however some of the thicker 20mm engineered wood products will have a traditional T&G Joint and will require Glueing)
Q: Will my oiled Wooden floor require regular maintenance?
A: Yes - the amount of maintenance will depend of the usage. The use of an oil refresher or maintenance oil will enhance the appearance and protect the surface of your new real wood flooring .
Q: What is the difference between an oiled and lacquered floor?
A: In simple terms, an oiled finish penetrates into the wood flooring and is absorbed by the timber, giving a flat, gloss-free, natural looking finish. An oiledwooden floor also gives the opportunity to refinish isolated areas.
With a lacquered floor, the finish is applied to and seals the surface of the wood. Lacquered wooden floors will normally be available in satin, silk matt or matt finish.
The matt lacquer finish will give an appearance similar to an oiled floor without the maintenance requirements.
Q: Is a solid wood floor better than an engineered floor?
A: Not necessarily - an engineered wooden floor will offer greater stability and can be used for more types of installation. An engineered wood system also allows for the introduction of a 3wood flooring underlay with thermal and sound reducing properties and vapour barriers. A solid wood floor, however, if secret nailed or fully adhered will give a more solid feel underfoot.
Q: Can I install a solid wood floor over under floor heating?
A: No - we would not recommend the use of solid wood floors with Under Floor Heating.
Q: Can I install a solid wood floor as a floating-type installation?
A: No - a solid wood floor is not as stable as an engineered wood board and cannot be installed in this fashion. It would need to be either secret nailed or fully adhered with a suitable adhesive.
Q: How do I install my solid wood floor or real Oak Flooring over a concrete base?
A: Providing the floor complies with temperature and moisture requirements and is level, solid, smooth and even, the floor will need to be fully adhered with a suitable recommended adhesive. Specific manufacturers’ instructions must be adhered to, and we would recommend the installation is completed by an experienced tradesman.
Q: How do I install my solid wood flooring over a wooden base?
A: Providing the floor complies with temperature and moisture requirements and is level, solid, smooth and even, the floor would normally be secret nailed with a Porta Nailer or similar type tool. Specific manufacturers’ instructions must be adhered to, and we would recommend the installation is completed by an experienced tradesman or floorlayer.
Q: How much wastage do I need to allow when ordering my wooden flooring?
A: We would typically recommend 5% but it will depend on the complexity of the layout, the amount of angled / curved cutting, and the skill of the installer. If in any doubt, consult an experienced installer or our sales team for more detailed advice.
Q: What accessories will I need for my new Timber Floor?
A: Engineered Timber floors will normally require a suitable underlay incorporating a vapour barrier (if being installed as a floating floor). You will need threshold strips of a suitable type for doorways and consideration should also be given to perimeter expansion details.
Q: How do I cover my perimeter expansion gap?
A: If you are able, the installation will always look better if the skirtings are removed and replaced on top of the new wooden floor, allowing for the manufacturers’ specified expansion gap. However this is not always an option. Where this is not possible, a scotia moulding in white or a matching hardwood would normally be used (see our accessories section).
Q: How do I finish around radiator pipes?
A: You finish around pipes with our pre-finished, hardwood dowelled ferrules. (or you can cut a neat hole allowing adequate expansion with a hole saw)
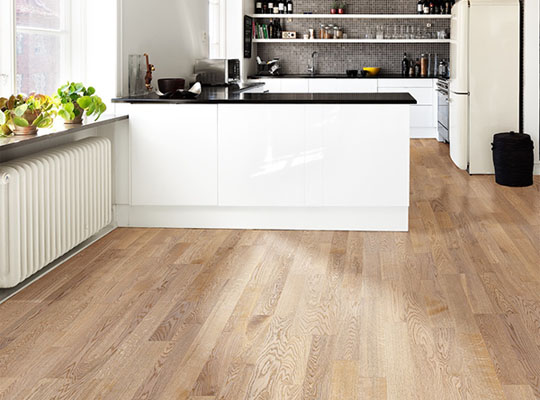
Q: Is my floor suitable for Kitchens and Bathrooms?
A: Both engineered and solid wood floors will be suitable for use in Kitchen / Dining room areas. We would not recommend the use of either engineered wood flooring or solid wood flooring in Bathroom areas or areas subjected to high levels of humidity and a wide range of temperature change.
Q: Which species of wood flooring is the hardest?
A: Real Oak Flooring is hard, dense, and extremely strong which makes it suitable for flooring use. Please see below for hardness comparisons, using Oak as a reference for comparison:
Ash 10% harder than Oak; Hard Maple 30% harder than Oak; Beech same as oak; Cherry 3% softer than Oak; Walnut 10% softer than Oak; Jarrah 25% harder than Oak
Q: Square or Bevelled edges?
A: The majority of ‘prefinished’ solid wood floors and thicker engineered Flooring (18mm thick plus) will have a bevelled edge. Standard 14mm or 15mm engineered wood flooring will often be available with and without a bevel. Unfinished solid wood floors will normally not have a bevelled edge. Having a square or bevelled will not affect the performance of any floor; it is simply a matter of personal preference.
Q: Is a wooden floor cold?
A: This will be subject to site conditions; normally both engineered and solid wood floors are warm to the touch.
Q: What is the difference between a laminate floor and an engineered wood floor?
A: In summary, a laminate floor would typically have mdf or hdf core with a photographic simulation of a real wood surface with a clear-coat wearing layer over the top.
An engineered wood floor will be of a better quality and will have a real wood wearing layer, varying in thickness from 3.5mm-6mm.
Q: What is the difference between a solid wood floor and an engineered wooden floor?
A: In summary, a solid wood floor (as the name suggests) is one complete layer of solid wood from the underside of the board to the top surface, with no cross-laminating or multiple layer-type construction.
An engineered floor will typically consist of a real softwood or multi-layer, ply-type core, with a real wood top layer. An engineered wood floor will have greater stability and will be suitable for use over a wider range of areas.
At Oak Flooring Direct, we supply engineered wood, particularly engineered oak flooring, from any number of different suppliers. On this page, I’ll run through some of the basics of our engineered wood flooring range.
Before we begin, remember we’ll always try to find you the correct product for your needs at the best price we can. Nine times out of ten, we can best achieve this if you speak with us directly, over the phone, via email or through our website chat. Our team pride themselves on their knowledge, their friendly, open and honest advice and their energy in finding you the best price they can!
Engineered timber comes in many shapes (plank, parquet, panel), sizes (width, thickness, length), colours (produced by pigments, tints and smoking) finishes (lacquers, oils) and patinas (brushed, hand-scraped, band-sawn). This can make finding your preferred floor a confusing and drawn out process. Trust us when we say you’ll generally require a fair amount of expertise to make the right choice – that’s why we’re in a job after all!
What defines an engineered board as opposed to a solid wood board is that solid boards are constructed wholly of a single piece of hard-wood while an engineered board is constructed of layers of soft-wood, topped with a solid wood veneer. It is the veneer which’ll form the surface you walk over.
The multi-layered structure of engineered boards mean that they will form a more stable floor than a traditional solid wood floor system. The crossed layers counteract the natural movements of the timber flooring, which is caused by subtle changes in temperature and moisture. This also enables many engineered wooden floors to be installed over under floor heating systems.
Engineered wood flooring is also more environmentally-friendly than some solid wood flooring, as fast-growing wood species like spruce, pine, poplar and birch are used for the intermediate layer
14 – 15mm thick, high-quality engineered wood floors can be sanded two to three times over the lifetime of the floor. 20mm thick boards with thicker wear layers can be sanded back many more times.
Browse our Engineered Wood Flooring Here…
We sell four core engineered flooring brands at Oak Flooring Direct. Remember, we’re Engineered Wood Flooring specialists. If you have a particular specification or finish, contact us with your requirements and we’ll source the right product at our best price.
Norske - Browse our range here...
Within the Norske Range there are two basic board formats:
14mm Thick, 2.5mm wear layer, click system, multiple widths available
15mm Thick, 3.0mm wear layer, tongue and groove system, multiple widths available
Prices range between £19.95/m2 ex. VAT to £78.65/m2 ex. VAT
View our Norske best sellers: Bamble, Arendal, Finnmark, Egersund, Joshua, Otta, Drammen, Skyling and Harding
OFD - Browse our range here...
The idea behind the OFD range is that these boards are ‘structural’ – they’re thick enough to be load-bearing and can be laid directly over joists or batons.
18 - 20mm Thick, varying wear layers, tongue and groove system, multiple widths available
Prices range between £43.95/m2 ex. VAT to £54.95/m2 ex. VAT
View our OFD best sellers: Amelia, Bella, Francesca, Bailey, Isabella
Kahrs - Browse our range here
Kahrs do a wide range of species, thicknesses and finishes. They generally specialist in boards with plenty of rusticity and character. As a rule of thumb, the thicker the pricier.
20mm Thick, 5.0mm wear layer, tongue and groove system
15mm Thick, 3.5mm wear layer, click system, multiple widths available
13mm Thick, 2.5mm wear layer, click system
11mm Thick Parquet, 4mm wear layer, tongue and groove system
10mm Thick, 1.9mm wear layer, click system,
7mm Thick, 0.6mm wear layer, click system, multiple widths available
Prices range between £22.10/m2 ex. VAT to £87.55/m2 ex. VAT
View our Kahrs best sellers: Hampshire, Cornwall, Jersey, Earth, Linen, Straw
Boen - Browse our range here
14mm Thick, 3.5mm wear layer, click system, multiple widths available
20mm Thick, 4.5mm wear layer, tongue and groove system
10.5mm Parquet
10.0mm Parquet
12.5mm Parquet
View our Boen best sellers: Animoso 138mm Matt Lacquer, Animoso 209mm Matt Lacquer, Finale Matt Lacquer, Andante 138mm Matt Lacquer, Andante 209mm Matt Lacquer
Elka (prices range between:
14mm Thick, 3mm wear layer
12.5mm Thick, 2.2mm wear layer, click system
At Oak Flooring Direct, we’ll always try to find you the correct product for your needs at the best price we can. Nine times out of ten, we can achieve this best if you speak with us directly, over the phone, via email or through our website chat. Our team pride themselves on their knowledge, their friendly, open and honest advice and their energy in finding you the best price they can!
Oak Flooring Direct Measuring Guide.
Measuring and estimating the amount of wood flooring required can depend on various factors including the complexity of the layout and the amount of cutting involved.
As a general guide an allowance of around 5% for waste should be allowed on top of the actual area.
Please see detailed below a guide for measuring your areas ready for your new wood flooring.
Square or rectangular areas
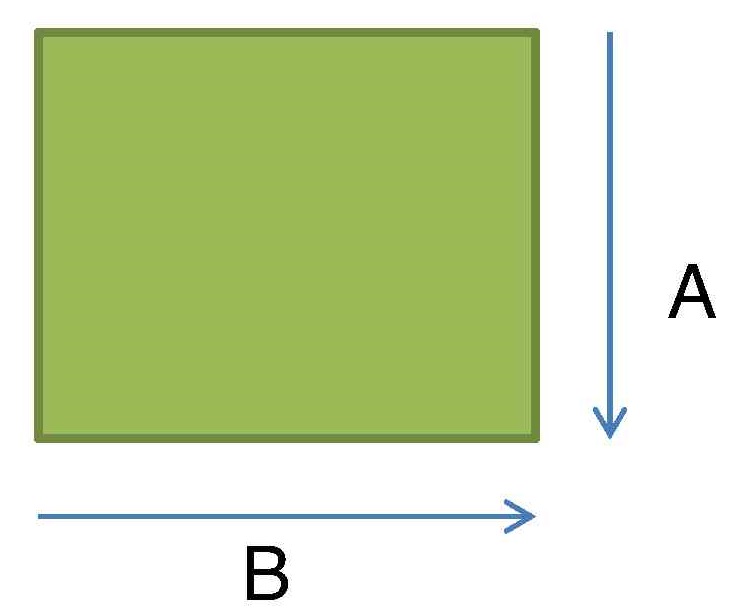
1) Measure the distances at Point A & B
2) Multiply the two distances together, for example, “A” 3.00m by “B”4.00m would equal a total of 12.00 m2
3) Add wastage factor as required (typically 5%)
Irregular Shaped Areas
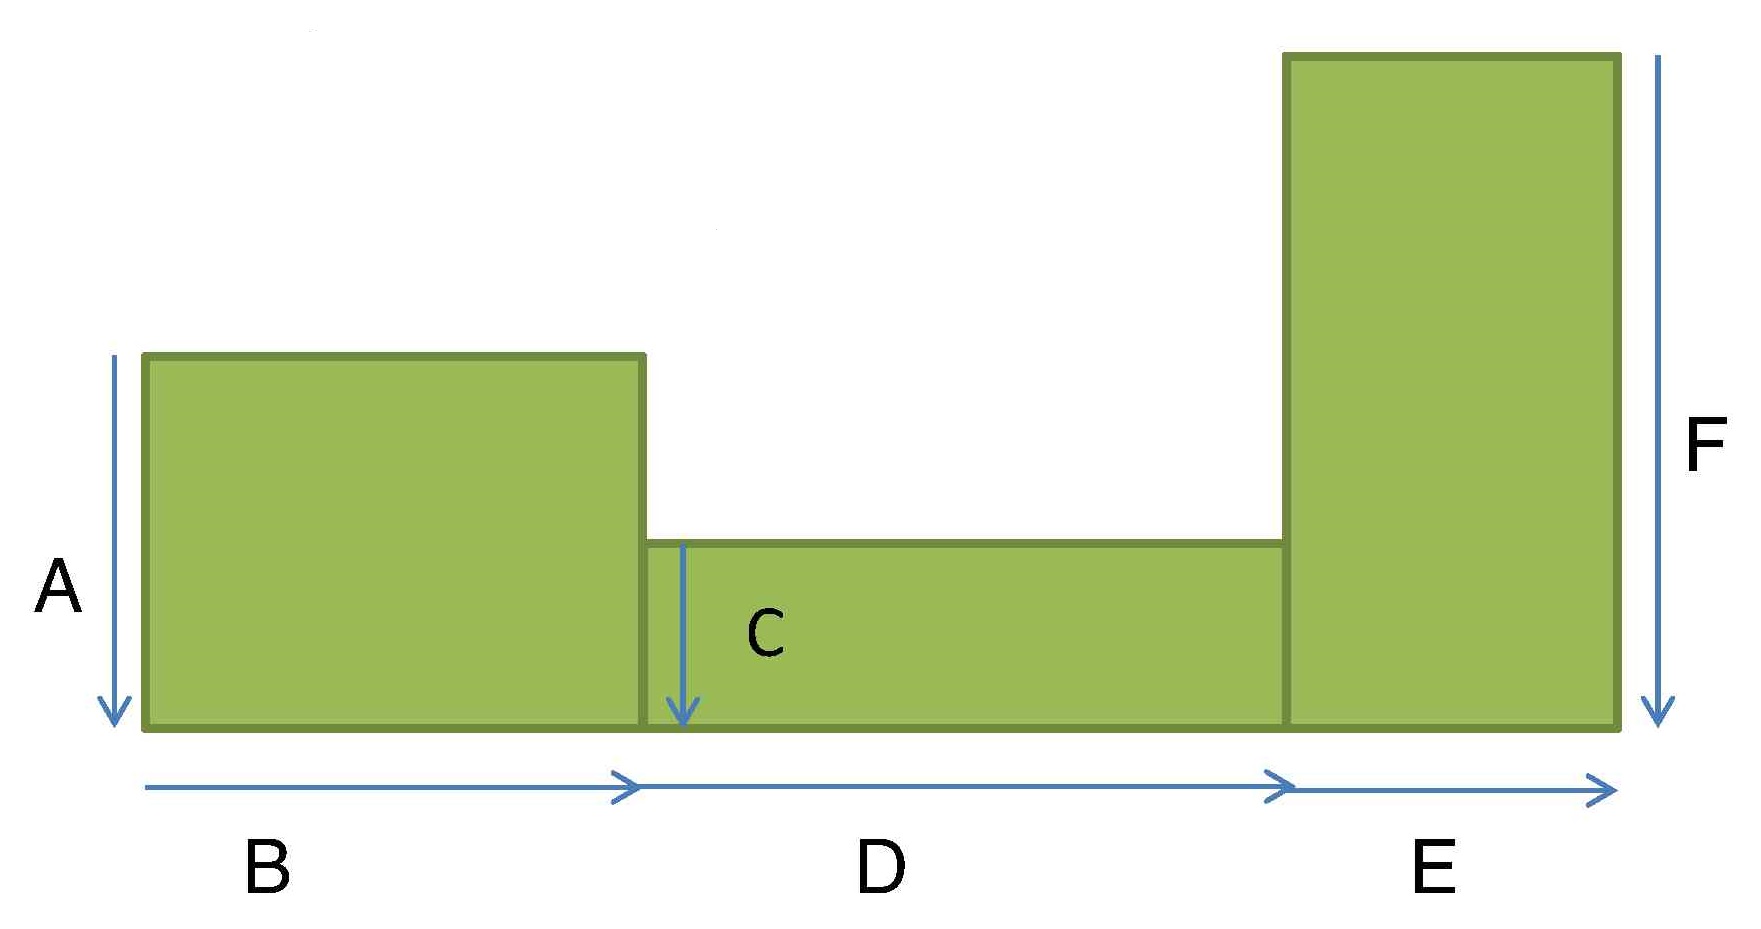
1) Measure the distances at Points A & B
2) Multiply the two distances together
3) For example “A” 3.00m multiplied by “B”4.00m would equal a total of 12.00 m2
4) Repeat the operation for distances C & D and E & F
5) Add the 3 totals together
6) Add wastage factor as required (typically 5%
ENGINEERED WOOD FLOORING
Boen-10mm-Prestige-herringbone-installation-guide
Boen-14mm-and-21mm-T-and-G-installation-guide
Boen-23mm-Sports-flooring-installation-guide
Boen-chalet-and-chaletino-installation-guide
Boen-click-herringbone-floating-or-glue-down-installation-guide
Boen-X-PRESS-Floating-installation-guide
Boen-X-PRESS-glue-down-installation-guide
ELKA-14mm-sawn-Uniclic-installation-guide
ELKA-14mm-Tongue-and-grooved-engineered-wood-installation-guide
ELKA-14mm-Uniclic-installation-guide
ELKA-18mm-21mm-22mm-engineered-wood-installation-guide
ELKA-FitXpress-installation-guide
Kahrs-2G-engineered-wood-installation-guide
kahrs-5G-engineered-wood-installation-guide
Kahrs-5S-engineered-wood-installation-guide
Kahrs-subfloor-underfloorheating-engineered-wood-flooring-guide
Kahrs-tongue-and-groove-chevron-engineered-wood-installation-guide
Norske-Installation-Guide-Engineered-Wood-Flooring
OFD-Installation-Guide-Engineered-Wood-Flooring-by-Oak-Flooring-Direct-Bristol
OFD-15x148mm-Herringbone-engineered-oak-installation-guide
Quick-step-parquet-engineered-wood-floating-installation-guide
Quick-step-parquet-engineered-wood-glue-down-installation-guide
Quick-step-parquet-intenso-engineered-wood-glue-down-installation-guide
Woodpecker-Berkeley-installation-guide
Woodpecker-Chepstow-installation-guide
Woodpecker-Goodrich-installation-guide
Woodpecker-Harlech-installation-guide
Woodpecker-Salcombe-installation-guide
Woodpecker-Underfloor_heating_guide
LAMINATE FLOORING
ELKA-FitXpress-Laminate-installation-guide
ELKA-Laminate-installation-guide
Quick-step-Arte-installation-guide
Quick-step-Eligna-Impressive-Ultra-Majestic-installation-guide
Quick-step-Exquisa-installation-guide
Quick-step-other-laminate-installation-guide
Woodpecker-Brecon-installation-guide
Woodpecker-Wembury-installation-guide
LUXURY VINYL FLOORING
Elka-LVT-Instructions-with-UFH
Kahrs-luxury-tile-click-installation-guide
Kahrs-luxury-tile-dry-back-installation-guide
Kahrs-luxury-tile-loose-lay-installation-guide
Karndean-Arte-Select-Free-Length-installation-guide
Karndean-Basketweave-installation-guide
Karndean-Design-flooring-installation-guide
Karndean-Heritage-Clifton-straight-installation-guide
Karndean-Heritage-Lansdown-diagonal-installation-guide
Karndean-Heritage-Mayfair-diagonal-installation-guide
Karndean-Heritage-Montpellier-straight-installation-guide
Karndean-Kaleidoscope-installation-guide
Karndean-Korlok-installation-guide
Karndean-Loose-Lay-installation-guide
Karndean-Palio-Clic-installation-guide
Karndean-Random-Panel-installation-guide
Quick-step-click-vinyl-installation-guide
Quick-step-glue-down-vinyl-installation-guide
Quick-step-rigid-click-vinyl-installation-guide
SOLID WOOD FLOORING
ELKA-18mm-plus-Solid-wood-flooring-installation-guide
Woodpecker-York-installation-guide
BAMBOO
Woodpecker-Oxwich-installation-guide
UNDERLAY
Platon-Comfort-installation-guide
Platon-stop-installation-guide
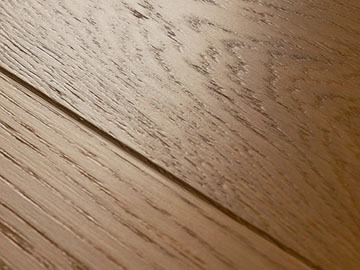
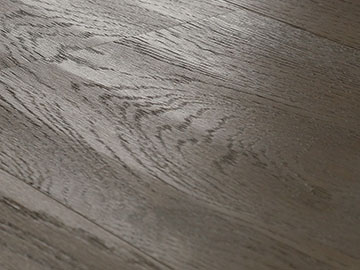
Every Wooden floor has its own unique pattern:
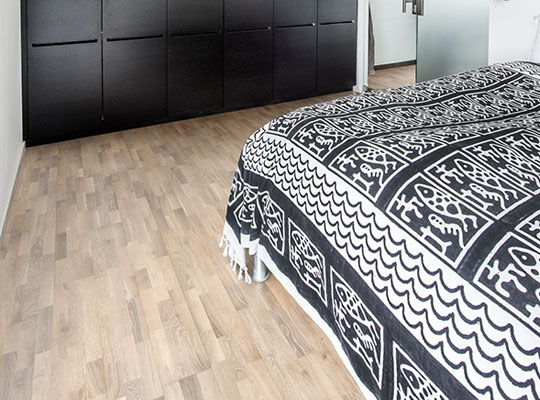
Wood flooring is a superb natural product. We’re working with something that nature has created – and nature is wonderfully diverse. The appearance of any wood floor depends on a number of factors, such as the wood species, the grain and the knots, etc. Each species of tree presents a variety of different colors and structures, allowing us to produce wood floors of many different appearances, depending on how we cut the wood.Our wide range of wood floors includes the following designs and patterns:
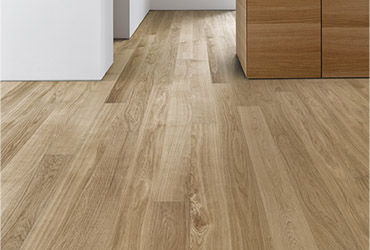
1-strip Wood Flooring gives an intense wood feel:
The surface layer of every 1-strip board is sawn from a single piece of wood. The natural appearance of the wood, with knots and variations in the colour and grain, is truly reflected in 1-strip flooring. But with some of our 1-strip floors, we’ve selected wood that has less variation in colour and fewer knots, so that you can find a floor which suits your style.
Strip flooring is available in several different lengths and widths. 1-strip floors suit larger rooms perfectly. I strip wooden floors can be slightly more expensive than two or three strip wooden floors as they are less economical to produce.
2-strip Wooden Flooring, floors with different characters:
The surface layer is two strips wide. The strips are selected and arranged to give each 2-strip floor a unique and individual character.
2-strip flooring is available in two formats: one with longer strips, and one with shorter strips. Floors with longer strips are ideal for larger rooms, whilst the shorter strip design is perfect for smaller areas.
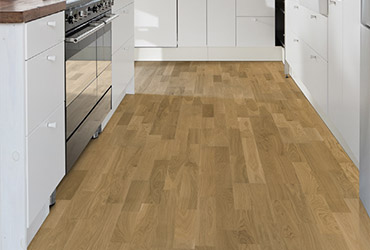
3-strip Wooden Flooring, a range of interior design options:
3-strip flooring has a surface layer where three strips of different lengths are placed width-ways, in a random order. 3-strip flooring offers a wide range of interior design options. We sort some of our 3-strips to create a lively expression, whilst other floors have a calmer feel. 3 Strip floors are often less expensive than a single strip floor as they use more of the tree during production making a 3 strip floor a cost effective solution.
Patterned Floors Herringbone / Chevron:

Patterned floors can give a characteristic and sometimes dramatic expression to a room, Dutch Pattern, Chevron, and Herringbone Floors are available, consider additional wastage and sometimes increased installation costs when purchasing.
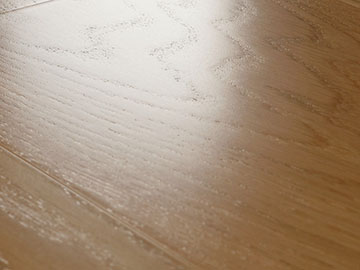
Wood Floor Grading:
As a wood floor is a beautiful and natural material, each order will be unique and different from the last.
We grade our woods into three different categories to give you an idea of the features that are to be expected from your new floor.
It is important however to understand that all products will have their own characteristics; we would encourage you to talk to our expert advisors to ensure that your new floor meets with your expectations. If you are in any doubt add additional waste & material to give you a greater selection of material when installing, this will be more expensive but will give you the option of being able to discard boards that you do not like. however ``designing`` the layout of the floor board by board will cost more in installation & labour costs & often can lead to a synthetic (non-natural) looking floor, a truly random layout will always give better results.
City/Select:
These floors are stylishly understated; they are created from a uniform and regular timber grade with small variations in grain and tone. They can be light or dark, depending on the wood species, but the tone and overall effect is uniform. If you like a calm, minimalistic impression, look for a floor in the City/Select Selection.
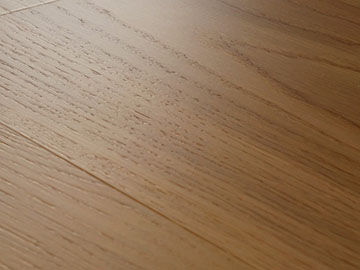
Town/Nature:
Dark or light, these floors are characterised by subtle variations in tone and pattern, without knots. They form a classic backdrop, allowing the rest of the decoration to take ‘centre stage’. If you’re looking for a floor with minimal variations, take a look at our Town/Nature Selection.
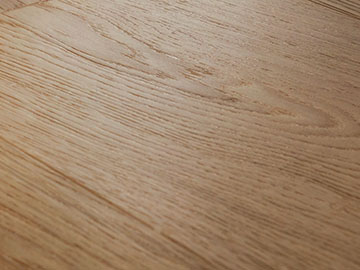
Rustic/Country:
If you’re looking for a more rustic floor, you’ll probably like our Rustic/Country Selection. Here, you’ll find dramatic gaining, gnarls and knots,with greater color variation, for a bold and unmistakably natural look. Note: some rustic floors can feature larger knots splits and shakes, please check when ordering.
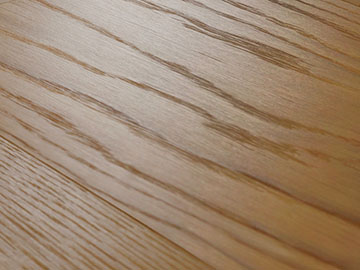
Dynamic:
These floors are made from boards with larger features including knots, shakes, and cracks that give a lively and dramatic yet warm character, a floor with lots of tonal variation and interest. Note: some Rustic Floors can feature some of these characteristics please check with our sales team when placing your order.
Expressive:
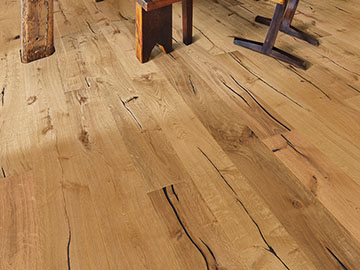
These lively wooden floors feature dramatic grain, gnarls knots, cracks shakes and splits, wide colour variation, generally a more rustic character.
Choose the right surface for your new wood floor:
The surface treatment you select for your floor affects the style, feel and durability of the wood. No matter what surface treatment you choose, your floor will be ready to walk on as soon as it’s installed.
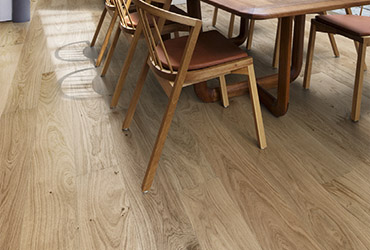
Gloss Lacquer:
The high gloss lacquer gives your wooden floor a shiny, polished look with a reflective surface, for a clean smooth look, consider gloss floors can show scratches more than a satin or matt floor.
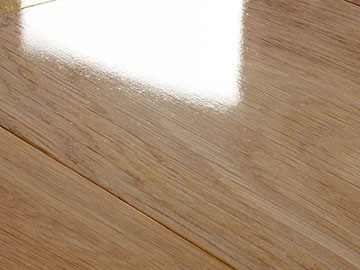
Satin lacquer – durable and easy to keep clean:
Lacquered floors are durable and easy to keep clean. Satin lacquer complements the wood’s character by accentuating its natural structure. It also makes the floor more hardwearing and easier to clean, providing a sheen level somewhere between Matt and Gloss.
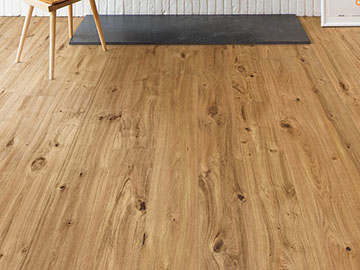
Matt lacquer – feeling of untreated bare wood:
Matt lacquer is as hard wearing and easy to maintain as the Satin lacquer. A Matt lacquer almost gives the impression that the floor is made of completely untreated bare wood. You can clearly feel the tactile, natural surface of matt lacquered floors, with your fingertips or as you walk barefoot. A Matt Lacquered floor can often look very similar in appearance to an Oiled floor, without the associated maintenance of an oiled floor.
Ultra Matt Lacquer:
Wood treated with an ultra Matt Lacquer, Fees and looks as if the floor was made from untreated timber, with a nearly invisible shield, slightly coarser than a Matt finish to touch.
Nature-oiled floors – more beautiful every time you treat them:
Natural oil gives your floor an amazingly beautiful look and feel. The oil brings out the fine structure and grain of the wood and deepens the natural wood colour.
Floors treated with nature oil are easy to maintain and keep clean, but they need a little more care and should be oiled at regular intervals. In return, your floor will become more and more beautiful, and will take on a deeper tone, every time you treat it.
Creating the most beautiful wood floors:
There is a growing interest in more advanced designs and decorations, among both interior designers and consumers. We acknowledge this trend and continue to develop new ways to bring beauty and new design to our wood flooring, increasing our ranges and the options within each. With different refinement techniques, we can further enhance the look and feel of our floors:
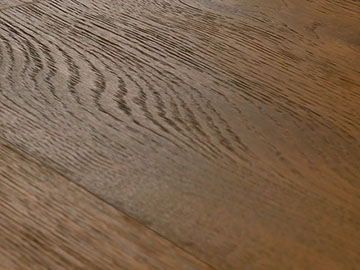
Brushing for texture:
Brushing the surface highlights the natural structure of the grain and creates additional texture, emphasising the wood feel of the floor. We vary the brushing effect depending on the wood species and use a variety of brushes made from different materials.
Brushing often takes place together with other refining treatments, such as bevelling of edges, staining or glazing. The final appearance and expression of the floor is determined by the choice of lacquer or natural oil. Brushed floors can often look a little darker in appearance, due to the textured surface being less reflective.
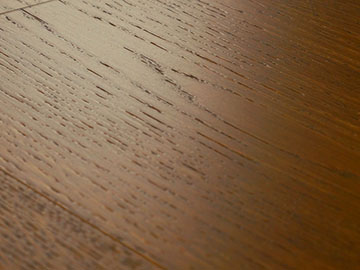
Saw Marks:
This involves the same process as hand scraping, the surface marks are created to replicate the effect of a chainsaw or bandsaw.
Smoked:
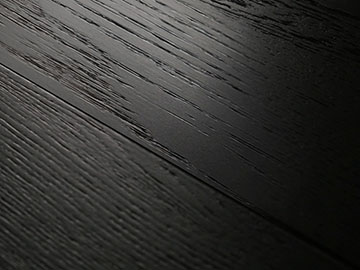
Colouring / Staining, for walls and for floors:
This special process alters the colour and shade of each plank, there are two grades of smoked finish, light and the darker fully smoked version, this can be subtle and can change between suppliers.
We can also use stains to further enhance the natural colour tones. Staining also allows us to completely change the tone of a floor, adding a whole new dimension to the natural wood. We provide a wide range of stained options – from palest white and whisper greys, to rich mocha and charcoal shades.
Bevelling: a small but distinct feature:
Bevelling the edges of a 1-strip floor accentuates each individual board, giving the floor a distinct and elegant look. We provide a number of floors with the edges bevelled to varying degrees – from “micro bevelling”, a tiny clarification of the edges created using sandpaper; to more dramatic bevelling on both the long and the short sides, giving a rustic, robust appearance to the floor.
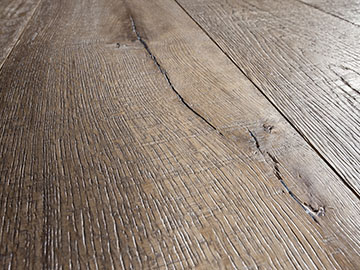
Hand scraped / Distressed Wood Floors:
Floors are given a worn, lived-in look through the use of special tools. A great amount of time is dedicated to crafting these hand-finished floors. The effect is authentic, natural and distinctly rustic. Perfect for character areas where a feature floor is required.
Still confused about which floor to choose? Call our friendly Expert Team FREE 08000566999 we would love to help.
Manufacturers Specific Guidelines:
1) Quickstep Laminate Cleaning & Maintenance
General Information:
Looking after your lacquered floor
For you to get as much pleasure as possible from your lacquered floor, it’s important that you look after and maintain it correctly.
Longer life with lacquer
Lacquered floors are durable and easy to keep clean. A hardwearing lacquer is renowned for letting the true character of the wood shine through, by emphasising its living structure. Whilst it is incredibly hard lacquer pre-finish is exceptionally thin and doesn’t conceal the structure of the wood, like many other competing lacquers do.
Cleaning lacquered flooring
Your wood floor will benefit from daily ‘dry’ cleaning, i.e. vacuuming or sweeping. If necessary, you can wipe it clean with a well wrung-out mop or cloth. Ensure that the floor is only dampened slightly, and that the film of water formed dries within one minute. Do not leave any spillages on your floor, particularly if your wood floor is made from beech or hard maple, as these wood species are particularly sensitive to moisture. How often you have to clean your floor, in this way, will depend on how dirty it is and how often you use the room.
A manufacturer approved cleaner will give you the best results. If you use a different cleaning solution, ensure that it is pH-neutral (maximum pH 8).
Stain removal — on the spot cleaning
If you end up with a stain on your floor, you can try removing it using a mild detergent (not containing ammonia) or you could try some washing-up liquid dissolved in warm water. If this doesn’t help, here are a few tips on how to remove difficult marks. But take care when using strong stain-removers, as using too much or rubbing too hard may affect the lacquer. It is also good practice to check with the specific manufacturers recommendations prior to attempting any works.
Mark |
Remove with |
Asphalt, rubber oil, shoe polish, soot and dried residues of chocolate or grease. |
Dilute alcohol, petroleum ether or similar. |
Wax crayon, lipstick, felt-tip pens. |
Dilute alcohol. |
Candle wax, chewing gum. |
Freeze spray, or put a plastic bag of ice-cubes on the mark. Then scrape off carefully. |
Give your matt surface a new lease of life
A Lacquer Refresher can give a new lease of life to a scratched matt floor surface, whilst also providing good protection. Before applying refresher, the floor should be free from polish, wax and other contaminants. Apply the refresher with a clean, soft cloth, sponge or polish applicator. If necessary, you can apply a second coat. Leave the refresher to dry for 30 minutes before replacing furniture. For floors in a domestic environment, one or two treatments a year is generally sufficient; one litre of refresher covers an area of approximately 60-70 m2.
Unlike floors that are maintained with polish or wax, a floor treated with a Lacquer Refresher can be re-lacquered. Remove all of the refresher, using an approved Remover, then sand the surface before re-lacquering.
Minor repairs
Small surface scratches and scrapes can also be treated with a Lacquer Refresher. Slightly deeper scratches have to be treated first with a Touch-Up Lacquer or matt lacquer. Any small dents can be filled with a Touch-Up Lacquer. If the dents have cracked, apply new matt lacquer.
Deeper notches, cracks and scratches are best filled with a matching wood filler, then treated with a Touch-Up Lacquer or matt lacquer. If the damage to the floor is even more severe, damaged strips or boards may need to be replaced.
Renovation of lacquered wood flooring
If a small area of the floor lacquer has been scratched, under a chair for example, you can treat the floor with a Lacquer Refresher. The refresher conceals microscopic scratches. Before applying, vacuum the floor thoroughly and clean with an approved Cleaner to remove every trace of grease. If the floor is particularly dirty, you may have to clean it twice. Then you can apply the lacquer refresher.
Partial repair of multi-layer floors
If a small area has been damaged or worn through, or has to be repaired for any other reason, you may have to replace an individual board/boards. This can be completed by an approved installer.
Total renovation of lacquered wood flooring
If your floor is very worn, or if it needs to be renovated for any other reason, it is best to machine-sand back to bare wood, so that you can apply a new surface treatment. Follow the lacquer manufacturer’s instructions.
Please note: Some floors with very thin surface veneers cannot be sanded.
Things to bear in mind with lacquered flooring
- Ideally, use doormats both inside and outside external doors to prevent dirt and grit being walked in, which can cause considerable wear.
- Place protective pads under your furniture (but not metal feet which may leave marks and blemishes on a wood floor) to prevent unnecessary marks and scratches.
- Wood flooring expands and contracts depending on the ambient climate. To prevent movement and damage to the floor, avoid exposing your floor to temperatures above normal room temperature. The relative humidity should be kept between 30 and 60%. Some wood species — such as beech and hard maple — are more sensitive to climate variation than others.
- In rooms where water is often spilt, and where it may also be left on the floor, we recommend that an additional coat of lacquer is applied after installation. This seals the joints between the boards and gives better protection against water.
- A floor can be walked on, carefully, approx. 8 hours after lacquering. Rugs and carpets can be laid on the floor a week after lacquering. Be careful not to spill water on the newly lacquered surface during the first week, as this can cause permanent stains.
- Always refer to any specific manufacturers recommendations
Looking after a nature oiled floor
For you to get as much pleasure as possible from your nature oiled floor, it’s important that you look after and maintain it correctly.
More beautiful with every new coat of oil
Floors treated with nature oil are easy to maintain and keep clean, but they do need a little more care and should be oiled at regular intervals. In return, your floor will become more and more beautiful, and will take on a deeper tone, every time you treat it.
Looking after an oiled floor in the home is easy and treatment with polish isn’t necessary. But it is important to look after your floor, otherwise it will start to show footmarks and take on a slightly greyish tone. Our pre-finished nature oiled floors are ready-treated for use in domestic environments.
Cleaning nature oiled flooring
Note: Before carrying out any maintenance or repair work, please check that your floor is a nature oiled floor and not a UV-oiled floor, which is also common in domestic environments.
Your nature oiled wood floor will benefit from daily ‘dry’ cleaning, i.e. vacuuming or sweeping. If necessary, you can wipe it clean with a well wrung-out mop or cloth. Ensure that the floor is only dampened slightly, and that the film of water formed dries within one minute. Do not leave any spillages on your floor, particularly if your wood floor is made from beech or hard maple, as these wood species are particularly sensitive to moisture. How often you have to clean your floor, in this way, will depend on how dirty it is and how often you use the room. A Manufacturer approved cleaner will give you the best results. If you use a different cleaning solution, ensure that it is pH-neutral (maximum pH 8).
Regularly cleaning your floor will prevent dirt from sticking to the oiled surface. However, unnecessary cleaning using wet methods will do more harm than good. This is particularly true over the first few weeks following maintenance with an approved Oil Refresher.
Stain removal — on the spot cleaning
Make sure that you clean up stains as quickly as possible, using water a manufacturer approved cleaner, or a neutral detergent. If this doesn’t work, the stain can be removed using a green nylon cloth, such as Scotch-Brite. After removing the stain, the cleaned surface may need to be touched up with a little extra Touch-Up oil before you apply an oil Refresher.
Mark |
Remove with |
Asphalt, rubber oil, shoe polish, soot and dried residues of chocolate or grease. |
Dilute alcohol, petroleum ether or similar. |
Wax crayon, lipstick, felt-tip pens. |
Dilute alcohol. |
Candle wax, chewing gum. |
Freeze spray, or put a plastic bag of ice-cubes on the mark. Then scrape off carefully. |
Maintenance /repair of floors treated with nature oil
The need for maintenance will vary, depending on a number of factors. Maintenance should be carried out more frequently if the floor is cleaned regularly with a damp cloth, because this will have an abrasive effect on the protective coating. Floors subject to greater wear, such as surfaces regularly walked on with outdoor shoes, will also require more frequent maintenance. Pale, porous wood species, such as beech and ash, will require more frequent maintenance than other wood species.
Once your floor becomes harder to clean, it is time to carry out maintenance.
In most cases, the floor will require maintenance twice in the first year and then once a year. Ideally, your first floor maintenance should take place straight after it has been laid. During the first maintenance treatment, the entire surface should be treated; if you do this immediately after the floor has been installed, you won’t need to move any furniture. This will also give additional protection against moisture penetration between joints.
If you aren’t able to perform initial maintenance straight away, but wait six to twelve months, the easiest way to carry out the procedure is to move all of your furniture to one half of the room. Carry out maintenance on the cleared half, wait one to two hours, then transfer furniture to the treated area and repeat the procedure on the rest of the floor. Subsequent maintenance can be carried out on the parts of the floor surface that really need it, such as the areas that are walked on.
The floor’s moisture resistance, durability and dirt-repellent properties will increase each time you maintain it.
Microscopic scratches on nature oiled flooring
If a small part of the floor has been scratched, under a chair for example, you can treat the area with a manufacturer approved Oil Refresher. This oil refresher will conceal microscopic scratches.
Partial repair of multi-layer floors
Worn or damaged surfaces can be sanded or planed back to bare wood. Finish off with sandpaper, grain size 220, and then apply a thick layer of manufacturer approved Touch-Up oil. After approx. 30 minutes, wipe off any oil that the wood hasn’t absorbed. Leave the renovated surface to dry overnight. Then apply a layer of Oil Refresher to the surface.
If a small area has been damaged or worn through, or has to be repaired for any other reason, you may have to replace an individual board/boards. This can be complete by an approved installer.
Total renovation of an oiled wood floor
Once your floor has been in use over a long period, you may need to renovate it and apply a new oil treatment: Apply a thick layer of Manufacturer approved oil to the surface. Then polish the floor with a polisher set to 150 rpm, so that the oil dissolves any dirt. Use a nylon cloth, such as a green Scotch-Brite, or coarser grade, scrape up the dirty oil with a rubber scraper and then wipe up the remaining oil. Attach a cloth to the disc on the polisher and polish the floor until it is as dry as possible. Work on small areas at a time, so that the dissolved dirt doesn’t have chance to dry. Once the oil has set, the floor can be walked on.
If renovating the surface treatment isn’t sufficient, your floor may need to be machine-sanded back to bare wood and then re-oiled. Contact your floor oil supplier for advice.
Please note: Some floors with very thin surface veneers cannot be sanded.
Things to bear in mind with Oiled floors
- Ideally, use doormats both inside and outside external doors to prevent dirt and grit being walked in, which can cause considerable wear.
- Place protective pads under your furniture (but not metal feet which may leave marks and blemishes on a wood floor) to prevent unnecessary marks and scratches.
- Wood flooring expands and contracts depending on the ambient climate. To prevent movement and damage to the floor, avoid exposing your floor to temperatures above normal room temperature. The relative humidity should be kept between 30 and 60%. Some wood species — such as beech and hard maple — are more sensitive to climate variation than others.
- In rooms where water is often spilt, and where it may also be left on the floor, we recommend you treat the surface of your floor with an oil Refresher after installation. This seals the joints between the boards and gives better protection against water.
- Allow the floor to dry for 1–2 hours before walking on it. Do not walk on the floor in outdoor shoes during the first 24 hours following treatment. Remember that it takes 1–2 weeks for an Oil Refresher to become fully dirt-resistant. Be careful not to spill water on the newly treated surface during the first week, as this can cause permanent stains.
- Always refer to any specific manufacturers recommendations
A
Acclimatisation – The process of allowing your wood flooring to adjust to the humidity in your home. All wood will expand and contract relative to the amount of moisture in the air.
Adhesion – The process by which two materials are bonded together. The better the condition of the two surfaces, the better the rate of adhesion.
Ageing - A chemical process used to darken the colour of wood flooring without the need for stains.
Antique – Timber, usually around 250 years old that is still in its original condition or has been machined to achieve a specific size and finish.
B
Bevelled Edge – When the edge of a plank is planed to achieve a groove or ‘v’ effect in the join between boards when laid. Bevels can be on all 4 sides of the board or two sides only with a non beveled header joint.
Bleached – Flooring that has been lightened through the application of wood bleach or light stains.
Bowed – A form of distortion that can occur within mistreated wood that results in a curved, rather than flat face.
Brushed – A process carried out during manufacture whereby the timber is heavily brushed with thick copper wires to create a textured surface.
C
Colour change – Aesthetic changes within the colour of the wood. Caused over time due to a wide variety of factors including; light changes, air conditions or chemical reactions.
Crowning – Strips of flooring in which the centre of the board sits higher than the edges - the opposite of ‘cupping’.
Cupping – Strips of flooring in which the edges of the board sit higher than the centre - the opposite of ‘crowning’.
D
(DPM) – Abbreviation of damp proof membrane (sometimes referred to as a DPC or damp-proof course). A horizontal barrier designed to prevent the transfer of moisture (also known as rising damp).
Delaminating - Separation between layers in an engineered or laminate floor. Usually caused by the failure of adhesive between plies, or sometimes between the layers of stain or coating.
Distressed – An artificial process used to give flooring a ‘lived-in’ look. Various techniques can be used to create surface damage, dents, scratches and imperfections to edges and face. Boards are usually then finished with an oil to soften defects and give the appearance of a well-worn/period floor.
Durability - The ability of a wood species or finish to withstand external conditions, without a noticeable change in appearance.
E
End Joint – The end section of a piece of flooring that will be joined to the next plank. (often referred to as the header joint)
End Matched – The process of milling a male projection onto the edge of a strip or plank to allow a connection with its female counterpart on an adjoining unit.
Engineered Wood Flooring - A multi-layered wood flooring board comprising of a surface veneer of real wood, bonded to a central softwood core and a counter balanced backing of softwood.
F
Feature strip - A strip of wood used in place of a threshold or used to border a room. Usually purchased in a contrasting colour or species to the flooring.
Filler – A substance used to fill knots, holes or irregularities within a planed or sanded surface. The filler is used before applying any finishes.
Finish – The protective coating applied to a wood floor.
Floating floor – A floor that doesn’t need to be nailed or glued to the subfloor. Normally a floating floor will work on a click lock system, or a tongue and groove join glued together.
Fully Adhered - The term used when a floor is fully adhered to the sub-floor (or stuck all over) with a suitable approved adhesive
G
Grade - The term used to define and determine the quality and structural properties of raw timber.
Glue Down Installation - The term used when a floor is fully adhered to the sub-floor (or stuck all over) with a suitable approved adhesive
H
Hand scraped - The process used to alter the surface of a wood floor to create an uneven surface. This process aims to replicate the effect of foot traffic and wear characteristics of an older floor.
Hardness - The property of a material that rates its ability to withstand denting or being marked.
Hard wax oil – A surface-finishing treatment made from a blend of natural vegetable oils and wax.
Hardwood – Timber that originates from one of the botanical groups of deciduous trees that have broad leaves.
Herringbone - a traditional pattern used to create an interlocking pattern of blocks of around eight inches long.
HDF - high-density fibreboard is a type of fibreboard, which is an engineered wood product. It is similar to particleboard and medium-density fibreboard, but is denser and much stronger and harder because it is made out of exploded wood fibres that have been highly compressed.
Humidity - The amount of water vapour present in your room’s atmosphere.
Hygrometer - an instrument for measuring the degree of humidity or relative humidity of the atmosphere.
Header Joint - The Joint at the thin end (not sides) of two boards joining together often referred to as the end joint
J
Joist – One strut within a series of parallel beams used to support floor loads. These are supported in turn by larger beams, girders or load bearing walls.
K
Knot – The remaining feature formed when a branch or limb grows from the stem of a tree, these are normally filled with a suitable filler (as otherwise then often become loose and unstable)
L
Lacquer – A strong, hard wearing finish often used to seal wood flooring.
Laminate flooring – A hard wearing flooring product made up of a fibreboard core and melamine wear layer. Available in planks, blocks and squares.
Load bearing – A portion of a structure that can bear the weight of the force resting upon it.
M
Moisture content – The relative level of moisture contained within a piece of wood, usually expressed as a percentage of the total weight of the boards.
Mosaic parquet – A wood pattern wherein five fingers of wood are used to make up a ‘basket’; each ‘basket’ is laid in the opposite direction to the next and each panel contains approximately 16 baskets.
N
Nosing – A hardwood moulding commonly used to cover the outside corner of a step.
P
Parquet - A common term in the UK used to describe wood blocks or strips arranged in a geometric mosaic pattern for decorative effect. Some manufacturers use the term parquet to describe a 3-Strip floor. In Europe, ‘parquet’ (parkett) is used to describe any kind of wooden flooring.
Pin Holes – Can be caused when a finish flows into low lying or less dense areas of a board. Not necessarily considered a defect but can be covered with the application of additional lacquer.
Plain sawn – The usual way that a log is cut for flooring. This method results in a nice, random mix of grain patterns.
Plank – Solid wood or engineered boards designed to be installed in parallel rows.
Plywood – A board or panel made of cross-directional veneers and/or layers of wood for dimensional stability.
Port A Nailer - A mallet driven nail gun set at a prefixed angle to secret nail structural floors over joists or existing timber floors
Pre-finished – A hardwood flooring product that has already had protection applied to it by the manufacturer, usually a stain, oil or lacquer.
Prime Grade – A phrase used to describe the grading of a certain type of flooring. Prime flooring is a very clean grade, containing no knots or sapwood.
PVA (Polyvinyl Acetate) – A rubbery, synthetic polymer adhesive used for the bonding of porous materials such as wood.
Q
Quadrant - A convex shaped piece of timber, usually supplied in 2.4m lengths used to cover the expansion gap left around the perimeter of a wood floor. See also ‘Scotia’.
Quarter sawn - Wood that features a grain running parallel to the length of the board (sometimes called 'vertical grain'). In oak the boards have ray-like markings running diagonally across them.
R
Reclaimed - timber salvaged from use in other locations, to give the new environment and aged look and feel.
Relative humidity - ratio of the amount of water vapour present in the air, which the air would hold at saturation at the same temperature.
Rustic grade – A phrase used to describe the grading of a certain type of flooring. Rustic flooring will usually contain a number of knots, some sapwood and wide variation colour.
S
Sanded & filled – An unfinished product that has been factory prepared for treatment. The timber will be smooth and any open knotholes will have been filled.
Sapwood - The wood found around the outside of a tree. Sapwood tends lighter in colour than heartwood.
Scotia - A concave/half-round/quarter-pipe cut of timber usually supplied in 2.4m lengths. Scotia is used to cover the expansion gap left at the perimeter of a wooden floor.
Screed - A latex levelling compound used to create a clean, level subfloor for installation.
Sealer – The name given to any finishing material applied to stop the absorption of succeeding coats.
Secret nailing – The fixing method by which a ‘lost head’ nail is fired at 45 degree angle into the upper side of the tongue on a tongue and groove board.
Smoked - A manufacturer process used to darken wood flooring.
Softwoods – The designation given to timber produced from needle and/or cone-bearing trees (conifers).
Solid - Individual strips or planks of wood made from 100% hardwood.
Solid Flooring – Flooring made up of boards, which are single pieces of wood from top to bottom.
Solid engineered (semi solid) - A plank of around 20mm in thickness, comprised of a real wood veneer (around 5-6mm), bonded to a plywood base. Although technically an engineered product, solid engineered displays similar properties to solid wood as it can be nailed down to provide a structural floor.
Species - The type of tree from which the flooring is made, e.g. oak, ash or maple.
Split - Separations of wood fibre that run parallel to the grain.
Square Edge – A strip or plank of flooring with edges that are not eased or bevelled resulting in a smooth overall effect.
Staining - Altering the colour of wood with the application a dye, chemicals or finely divided pigments.
Stair nosing - A finishing piece applied to the forward edge of a step in order to create a rounded, quality finish.
Strip flooring - Solid or Engineered boards, usually less than 3 inches wide, installed in parallel rows.
Subfloor – The ground surface that the flooring will sit upon. Usually comprised of concrete, floorboard, chipboard or brick.
T
Texture – The term often used to describe the surface look and feel of floor.
Threshold - A finishing piece applied to a wood floor where there is either a break or gap to be covered e.g. through a doorway, descending to carpet etc.
Tongue & Groove – The process of milling a tongue into one edge of a plank and a groove cut into its opposite side. in strip, plank and parquet flooring. When the flooring is installed, the tongue of each strip is engaged with the groove of the adjacent strip.
Trim – Any finishing material used to cover expansion gaps around the edges of a wood floor.
U
Underlay - is a layer of cushioning, made of materials such as sponge rubber, foam, felt or crumb rubber, which is laid beneath flooring to provide protection and support.
Unfinished - a product requiring sanding and staining/finishing after installation.
Under Floor Heating - (often referred to as UFH) A source of electric or water based heating often used under engineered wood floors, installed by specialist contractors
V
V-joint – Another term used to describe edges that have been eased or bevelled.
Vapour barrier - Any material with a high resistance to vapour (foil, plastic film, specially coated paper). Commonly used to limit condensation and prevent the migration of moisture.
Varnish - A finish containing either natural or synthetic oils.
Veneer – A square edged piece of hardwood usually bonded to a softwood core and used to provide the surface face of engineered wood flooring.
W
Warping – The distortion of a piece of flooring from its true plane.
Width - The width of the cross section of an individual board.
Wire Brushing – A process used to add texture to the surface of a board.
Wood species - The primary plant species from which the wood veneer of a floor is made.v